Friday 10 January 2014

Marmo 2: Super Sexy Renders and SketchFab

I found out about the release of Marmoset Toolbag 2.0 during the christmas break and had to have a play with it, luckily I had finished my robot; so I shot him into marmoset and started to play around with some renders. Here's a few and a rough model sheet too:


Rough model sheet [Mistakes : normals are on backwards, changed his name from in-bot, topology is wrong.]
I also found out about SketchFab over the holidays, which is a website where you can upload models and people can view them in real time 3D; so I uploaded him to SketchFab and you can view him here : https://sketchfab.com/show/fff73062fc17491abaf09a0091d4a62e

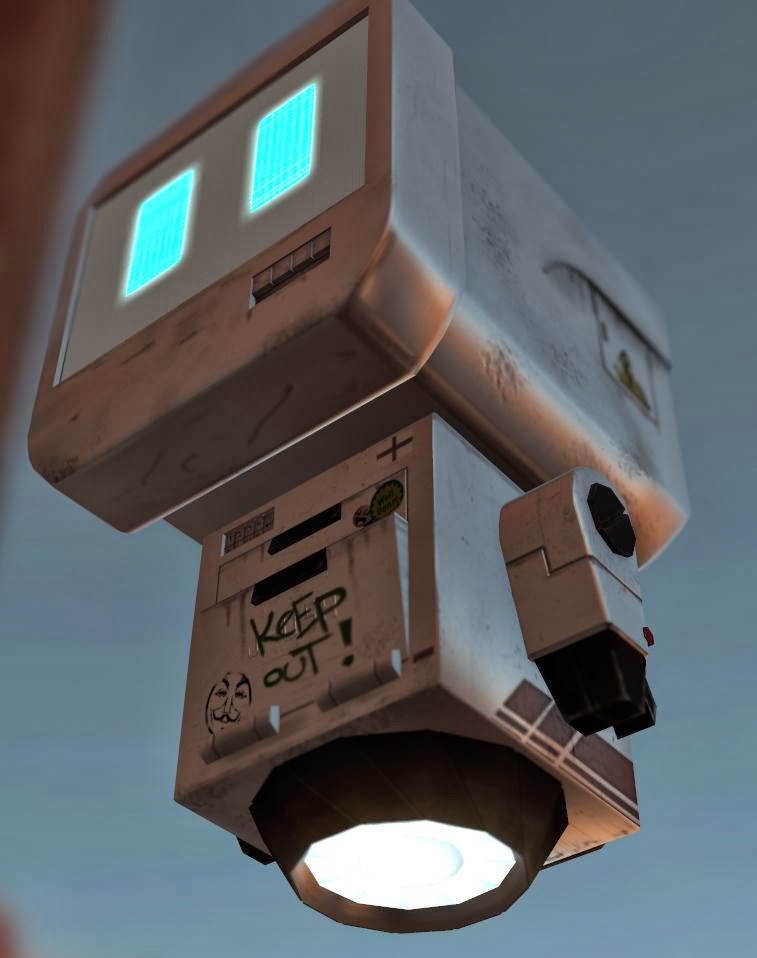
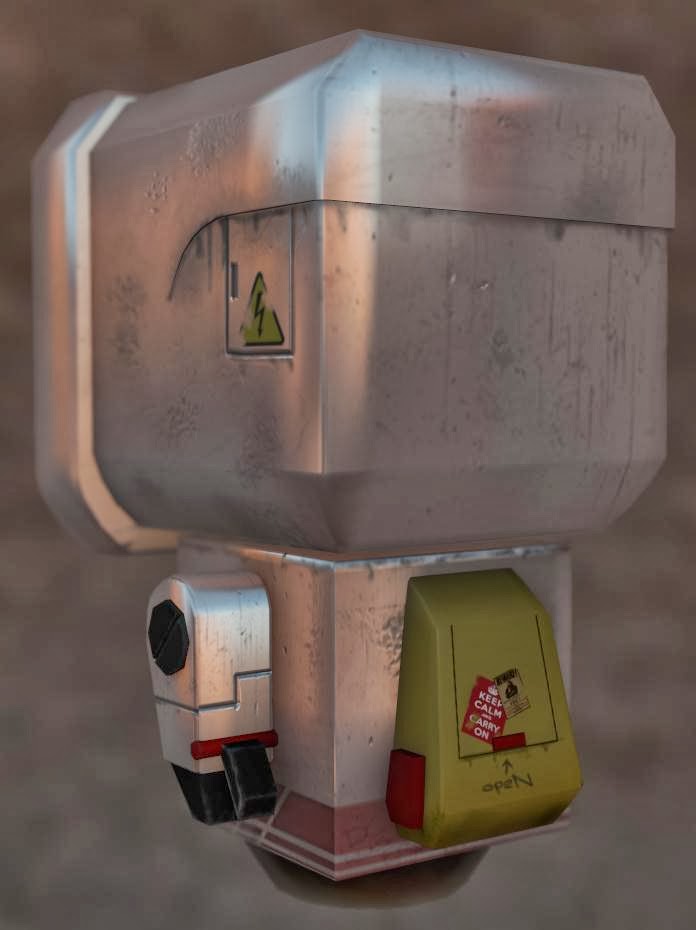
I still have a few fixes to do with this guy, but they aren't really noticeable problems and are quite minor and easy to fix [I hope] such as AO bake problems, neatening the textures and making a gloss map for him.
Note: I changed my robots name from "In-Bot" to "J-05H" as he was meant to be an inventory bot that kids get given to carry their stuff and keep an eye on them...like an interactive haversack lol but, I changed it to "J-05H" as a friend of mine recently went to jail and I won't see him for a while so I named it after him.

More Texturing...

After deciding on what eyes I wanted my bot to have I started on the main texturing, I started by making a base white shade and adding some scuffs and scratches too it. I then gave everything that needed a different base colour a colour and then refined them more and more.
Base colours
Finished Diffuse
After finishing my diffuse map, I then it to create a normal map using the Nvidea Normal plug-in for Adobe Photoshop and played around with it until I got the right looking normal map for my model. I then applied the normal to my 3D model in max and baked an ambient occlusion map using the normal map and a skylight.
Normal map and AO bake 
After this I created a few renders of my robot to show my diffuse, ao and normals I then posted them online to get some feedback and critiques on my work.
Diffuse only [back]
Diffuse only [front]


Once I had gotten some feedback off of the internet, I decided to create some self illumination maps for the eyes and the jet underneath which wasn't to hard in Photoshop, I just rendered everything I didn't want lit up in black.

Self illumination maps in action
Note : The textured robot as you may have noticed has less geometry, this is because I went back and forth between texturing and modeling as I added more useful geometry,updated UV maps and fixed numerous other problems [due to lack of modeling experience] but eventually got back in the swing of things.

Unwrap and Texturing

I started to unwrap and texture my robot through Christmas also. I started the Unwrap by selecting everything and unwrapping it together, rather than attaching everything so I couldn't pose it. I started my unwrap with the head then progressed down the body.
Head unwrap with checker grid to make sure there's no stretching.
I separated my UV's as I was unwrapping [e.g. head unwrap to the left and body to the right] and packed them by hand at the end.
UV's separated accordingly.
I separated my UV's so that they were easier to pack and that when I had packed them I could texture them easier as they are organized into manageable groups.

My packed UV's ready for texturing


No visible texture stretching, time to texture.
Once I packed my UV's I started to texture my robot, I started by making a rough texture because I wanted to get the eyes right first as I wanted them to stand out and it's the robots only means of emotion.


After doing these iterations and receiving some feedback from my friends and people on the internet I decided to go with the blue eyes as I thought they stood out the most and and would work a lot better with a  white robot.
After doing these iterations I started on the main texture of the robot.

Friday 3 January 2014

Geometry changes, Glass shaders and Topology....the joys.

Over christmas I have been Unwrapping and texturing my little robot. I haven't uploaded my blog in a while tho so here we go. Before I started to unwrap my robot, I got some advice from James Whatling that I could possibly push my polycount higher, as I was only on about 1900tris, I pushed him up to about 3500tri's by adding extra geometry in relevant places to create smoother looking edges. I mainly focused on making the head, body and arms more visually interesting.
With this one I eventually optimized the topology again as I didn't like the fact it wasn't quadded.
Added a few extra edge loops to make it more circular.
After I fixed the topology that needed fixing and added in some extra details to add to the visual interest of the robot, I wanted the screen to be realistic and reflective; so I created a glass shader in max and created a little oblong to slot into the screen area and applied my shader too it.
My raytraced glass shader.
I used raytracing and super sampling to create my glass shader and upped the specular intensity to about 250 and the glossiness to 75, this gave me a nice glass effect and looks nice when rendered.  
Here's the glass giving a nice reflection along with transparency and light refraction.
after completing this I moved onto unwrapping and texturing stage for my little robot.

Tuesday 17 December 2013

A note on Ngon checking

Today I had to re-do my Ngons as I had the wrong selection box on when I checked them last on the "by numeric" drop down, you should have the "greater than" arrow selected instead of the "equal to" which I had selected last time. So it missed out any Ngons that were greater than 5 sides which has costed me a day in my work. here's the example.
How to check for ngons
After doing this it should only select faces with more than 4 sides.

Monday 16 December 2013

Ngons and smoothing groups

Now I have finished my low poly model, I am going to go through and double check for Ngons and smoothing group errors so that my model is optimized for when I start my high poly model. As soon as I started checking for Ngons I found one straight away on the head.
Ngon on the side of the head.
To resolve the problem I used the "cut" tool and set the "snap" tool to "snap to vertex" and then cut between the vertex to fix the Ngon like so.
Using the "cut" tool to fix Ngons
I was lucky that this was the only Ngon on my robot model. So then I started on fixing the "smoothing groups" for my robot too give him some nice soft edges and some nice hard edges where applicable.
Fixing the smoothing groups on the head
Here's an example of how I've used smoothing groups to give the illusion of a curved surface on a hard surface model.
Before and after fixing smoothing groups.
Now that I have fixed the smoothing groups and spotted any Ngons that may mess up my model further into the project, all that is left to do is a quick "reset Xform" to make sure all is fine. Next I will move onto putting in some supporting edge loops, turbo smoothing and unwrapping my robot so that he is ready to put into zbrush or mudbox to add some surface detail.

Thursday 12 December 2013

Robot - Arms and Backpack

Also this week I have created the arms and back pack for my for my robot, I didn't find these to difficult as they are simple to model. With the arms I started from a cube and just started pulling and pushing vertices and adding edge loops until I got the right form for the arm, I then added a thumb (or what a robot version of a thumb is) so that he could pick up items with ease, Then I added a cylindrical joint so that he could move his thumb in a pincer style movement. I also tapered his fingers slightly again to ease picking up items.
Showing the open and closed hand and different elements.
I also created a little screw style hinge to attach the arms to the body, I just made a cylinder and extruded an edge inwards to create the flat headed screw look. 
With the back pack, I started from a box and added relevant edge loops to match with my turnaround and extruded sections accordingly. With the modelling I have tried to have as little triangles as possible and keep the majority of the model in quads. But this has been hard.
The backpack wasn't too difficult as it is a very basic shape and took up very little of my time, I will add all of the surface details within mudbox or zbrush and then bake the normals down for my lo poly model.

This is my finished (well I say finished) lo poly robot.


I still have to sort out the smoothing groups and ngons (if there are any...i hope not) on this model and unwrap him ready for the texturing and sculpting stages.